How To Lay Landscaping Rocks
How To Lay Landscaping Rocks
How to Lay Landscaping Rocks: A Comprehensive Guide
Introduction
When executing a landscaping project, one of the most popular ways to improve a home or business is to use natural decorative rocks. Natural stone gives a unique, natural look to any property, and when properly installed, they can help control erosion and create very attractive borders and pathways. Layering landscaping rocks is an easy way to create captivating outdoor ambiance, and a wide variety of sizes, shapes, and styles are now available. By following the steps outlined in this article, anyone can successfully install landscaping rocks and increase property aesthetic.
Choosing the Rocks
When selecting rocks for a landscaping project, it is important to choose rocks that are suited to the project at hand. Rocks vary in composition, shape, size, and color, and it is important to choose stones that contain the right specifications, such as those that are outlined in the local building or zoning code. Stones should also be chosen to create a design that will suit the landscape. The homeowner should take into consideration the shape, size, color, and number of stones they will need to complete their project. Weights of the stones should also be taken into consideration when planning the project, as some stones may be too heavy to place without additional support.
Preparing the Space
Once the rocks have been selected, the next step in successfully installing landscaping rocks is to properly prepare the area. Before any rocks can be placed, the area in which they will be installed should be cleared of any overgrowth and grass. After everything has been cleared, the soil should be leveled. This should be done to ensure that the stones lay flat and that surface drainage is adequate. Using a garden rake or shovel can help level the space and create a flat surface for the stones.
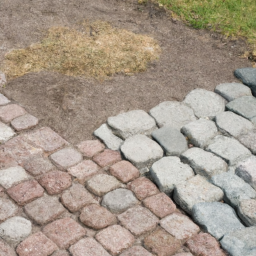
Rocks Placement and Schematic Design
Once the area has been cleared and prepped, the homeowner can start adding the rocks. Pay attention to the shape and size of the rocks. Smaller stones can be used for bolder colors or detailing, whereas larger stones can be used for edging, stepping stones, and walking paths. When laying the rocks, be sure to place the heavier stones at the bottom of the pile. When the rocks have been placed in the desired formation, the homeowner should take a step back and reevaluate the design. This will help to ensure that any fine-tuning or repositioning can be done before the project is completed.
Finishing the Area
Once the rock formation has been completed, the space can be finished in several ways. Natural stone can be enhanced with plants and flowers to create an attractive outdoor area. Mulch or soil can also be used to fill in the perimeter of the space, as well as to create pathways and define boundaries. It is also important to make sure that the area is properly sealed to ensure that it is weatherproof. Sealing the area will also help to protect it from freeze/thaw cycles, as well as to prevent the growth of mold or mildew. The finishing touches on any landscape project are often the most integral part, and can help make any outdoor space come alive.
Insights
Before getting started on any landscaping project, the homeowner should take into account the local building and zoning codes. While laying natural stone is an easy and cost effective way to create captivating outdoor spaces, proper preparation and installation are important to ensure the best possible results. With the proper preparation and careful planning, anyone can successfully create a beautiful outdoor area with natural stone.
Previous Page
Next Page